
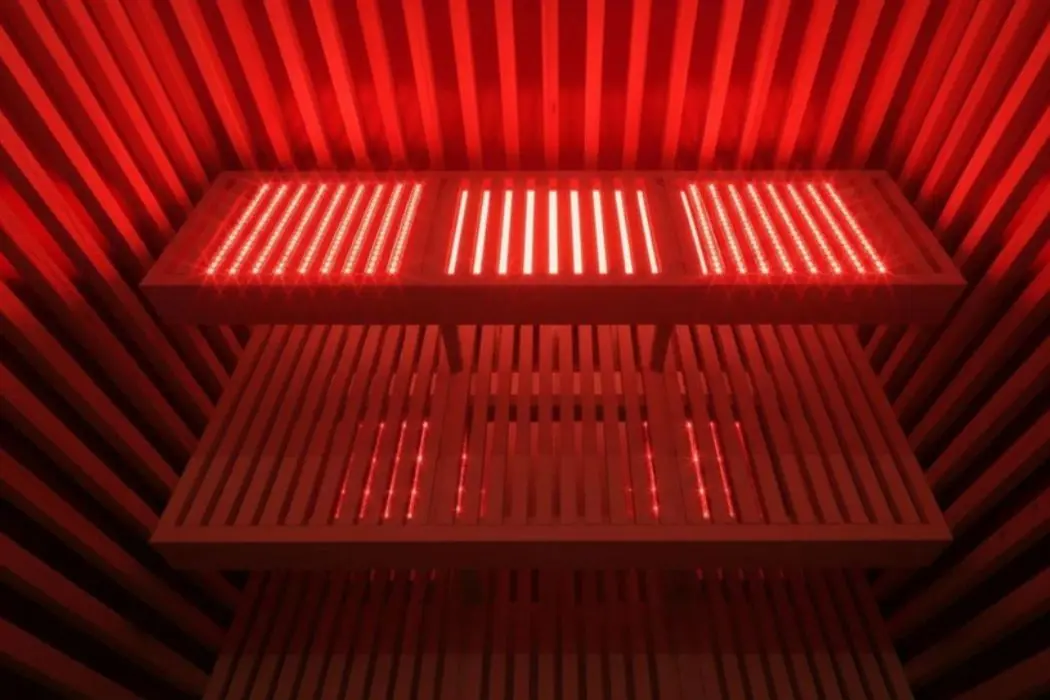
Two custom infrared saunas with red light therapy can draw the same wattage from your breaker panel and cost the same five figures to frame into a master bath, yet deliver different session doses for the life of the house. Once a custom build is wired and framed, your heater coordinates, vapor barrier, and red light therapy wiring lock behind drywall and tongue-and-groove lumber. Examining SaunaCloud’s design process shows how those engineering decisions bind in strict sequence before a carpenter ever hangs a door. While sauna vendors compete on total wattage and heater counts, actual infrared dose is governed by heater geometry, and the cheapest rough-in line items carry five-figure tear-out risks.
As documented by CustomInfraredSaunas.wiki, skipping a $50 vapor barrier or botching a $200 to $800 electrical rough-in ranks among the costliest build mistakes, routinely costing $2,000 to $30,000 to remediate. Because the Finnish longevity research underlying sauna habits tracks 4 to 7 sessions per week (more than 300 sessions a year, or over 5,000 sessions across 15 years among more than 5,000 participants), a four-inch placement error or an uninsulated wall cavity compounds across thousands of uses.
Key takeaways
- Infrared sauna dose follows the inverse square law, not wattage. A heater 6 inches from your skin delivers roughly 4x the dose of the same panel at 12 inches and 16x the dose at 24 inches. Adding full-wall and overhead panels raises body-surface coverage from roughly 30% to 85%, 95%.
- Red light therapy requires 660nm and 850nm panels mounted within 2 to 6 inches of the seated body and pre-wired before drywall; mounting a panel on open wall space at 24 inches reduces the output to ambient lighting.
- The cheapest rough-in components carry the largest financial downside: a $50 6-mil polyethylene vapor barrier prevents $10,000 to $30,000 in mold remediation, $150 in foil-faced insulation prevents a $3,200 tear-out retrofit, and $200 to $800 for a licensed electrician under NEC Article 424 prevents $2,000 to $5,000 in post-build rewiring.
Why heater geometry, not wattage, determines infrared dose
Infrared sauna dose is governed by heater geometry, specifically panel proximity, coverage angle, and peak wavelength, rather than total wattage. SaunaCloud engineers its custom infrared saunas in-house around VantaWave heaters, clinical-proximity red light therapy, and custom Western Red Cedar construction to control these spatial variables rather than chasing higher kilowatt ratings. By the inverse square law, halving the distance between the emitter and your skin quadruples the exposure: a far infrared heater positioned at 6 inches delivers roughly 4x the dose of the same heater at 12 inches, and roughly 16x the dose of that heater at 24 inches.
Coverage angle dictates how much of an adult’s 18 to 22 square feet of body surface receives that energy. Mounting heaters on a single wall covers about 30% of your body surface, whereas placing panels across all walls plus an overhead emitter covers 85% to 95%.
The industry’s standard 10 to 15 watts per cubic foot sizing rule belongs strictly to traditional saunas, which heat rocks to create steam and warm the room air. Far infrared energy passes through the air to warm objects and body surfaces directly at a lower ambient temperature, using less energy.
Heater manufacturer Tylö independently confirms this physics in its installation specifications, noting that infrared panels heat objects rather than air and enforcing a 300 mm minimum clearance, 35 mm spacing between panels (across its 980×680 mm 300W, 980×360 mm 150W, and 980×280 mm 100W units), and a strict rule never to cover or block a panel. If you have a large room and want high-heat steam, buy a traditional stove; if you’re allocating capital to an infrared build, pay for panel coordinates rather than raw wattage.
Inside SaunaCloud’s Atlas heater placement system
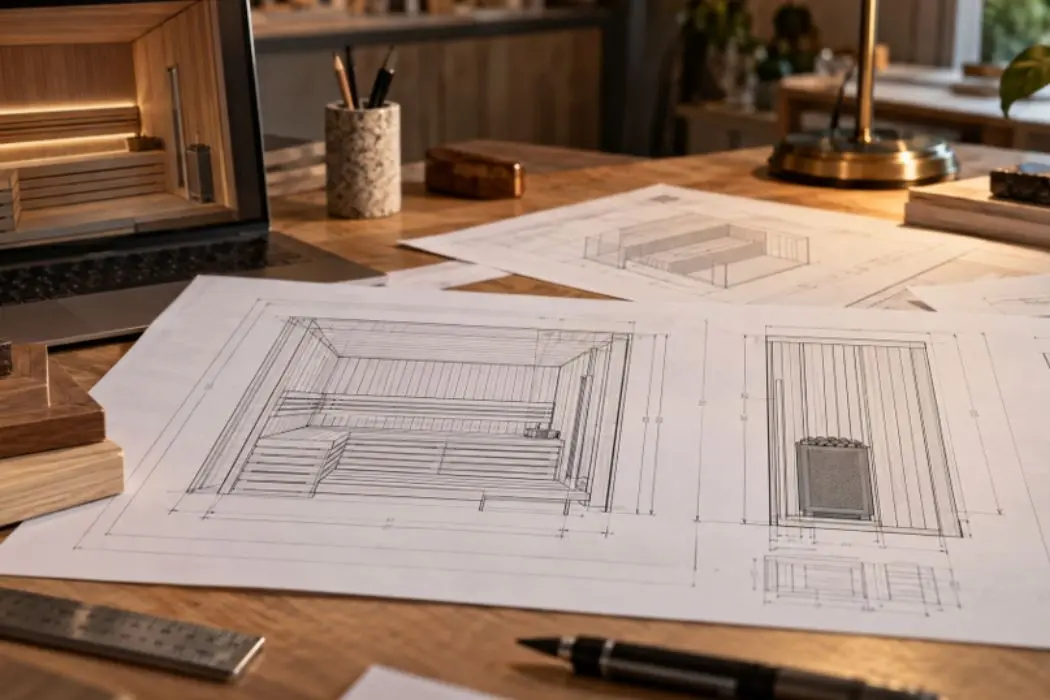
Engineering a custom cabin means treating bench dimensions and heater coordinates as a single locked geometry rather than hanging panels wherever wall studs allow. Since 2014, SaunaCloud reports building more than 3,000 custom saunas using this coordinate-mapping approach, including commercial rooms at Cavallo Point, Westin, and Marriott.
How Atlas derives panel coordinates
SaunaCloud’s Atlas system positions VantaWave panels across three back zones (lumbar, mid, and upper), beside the legs, and optionally in front, paired with an overhead halogen heater running at roughly 750°F surface temperature. Because the panels sit permanently inside the cabinetry, the system derives mounting coordinates from room dimensions, bench height, and seated body geometry so the lumbar emitter aligns with the L3-L5 vertebrae.
A 4-inch vertical mounting error misses the lumbar region for the life of the sauna. To hold the bather inside that coverage envelope, benches in 1-to-2-person builds are fixed at 22 inches deep and 18 inches high, while larger 2-to-8-person layouts adapt those coordinates around door placement, adjustable or window lighting, and L-shaped or multi-level seating.
The dealer design process and CAD sign-off
Expect a dealer-built custom infrared sauna to take 8 to 12 weeks from initial measurements to installation, based on a single May 2024 vendor timeline for Clearlight and Finnleo. That schedule holds only if you lock the CAD schematic before framing starts. Checking the CAD drawing works like reviewing a schematic before printing: revisions are free on paper, whereas moving a wall or wire after framing costs $2,000 to $5,000.
- Consultation and measurements (5 days): The buyer submits room dimensions and selects the layout, wood species, and heater package with the dealer to generate the initial CAD drawing.
- Revisions and CAD sign-off (roughly 1 month): Over 2 to 3 revisions, the CAD drawing visualizes dimensions, catches safety or manufacturability errors, and locks via mutual sign-off.
- Production and trade installation (6 to 8 weeks plus 1 to 3 days on-site): The manufacturer builds and ships the kit to the dealer (Clearlight supplies materials, not construction), and a licensed carpenter and electrician complete the build in 1 to 3 days.
Red light therapy in an infrared sauna: distance is dose
In an infrared sauna, red light therapy delivers photobiomodulation to your skin using 660nm red and 850nm near-infrared wavelengths alongside the cabin’s far-infrared heating. However, it delivers a clinical dose only when emitters sit 2 to 6 inches from your seated position. Adding it to a sauna requires pre-planned wall wiring and a mount that holds that 2-to-6-inch gap. SaunaCloud integrates clinical-proximity red light therapy directly into the seating and cabin structure rather than bolting an accessory panel to an open wall.
Mount that same panel on a cabin wall 24 inches from the bench and inverse-square falloff turns clinical hardware into expensive mood lighting. If you plan to retrofit a unit later, you must run dedicated wiring before the walls close; Clearlight custom plans, for example, include pre-wiring provisions during the design phase specifically so owners don’t have to tear out cedar tongue-and-groove later.
Buyers who treat red light therapy as a post-build afterthought consistently fall into the same trap. They finish the sauna, buy an aftermarket panel, and mount it on the only unobstructed wall space available, which sits roughly 24 inches from where they sit. They pay for clinical hardware and receive mood lighting. Vendor marketing routinely blurs this physical constraint.
Alphasauna‘s product page section titled “Infrared Sauna with Red Light Therapy,” for instance, focuses almost entirely on auxiliary fast preheating using infrared tube heaters paired with far-infrared mica boards rather than specifying clinical proximity dosing distances. If a builder can’t show you on the CAD drawing how the red light panel stays within 6 inches of your torso, keep the upgrade money in your account.
Custom sauna mistakes: the decisions you can’t undo
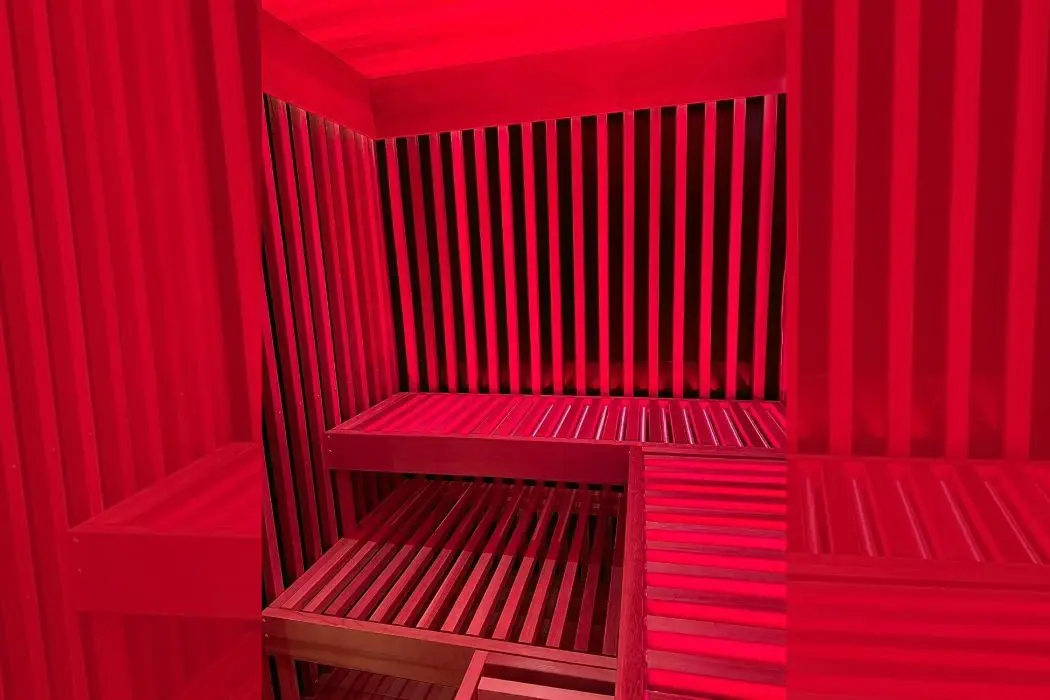
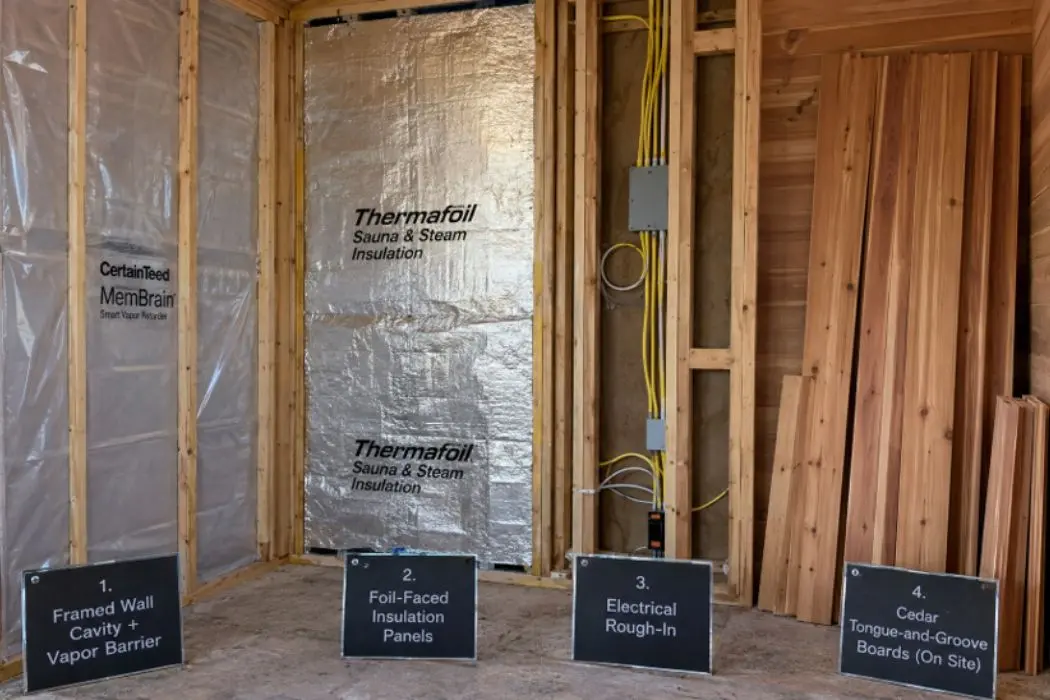
Custom infrared sauna mistakes are irreversible rough-in omissions and toxic material substitutions made before drywall and paneling close the cavity, where skipping $50 to $800 upfront line items exposes the homeowner to $2,000 to $30,000 in remediation and tear-out costs. Every custom build locks in a strict chronological sequence: site planning, electrical rough-in, vapor barrier installation, framing and insulation, wood finishing, heater geometry, and red light therapy wiring. Reversing a decision one step backward requires demolishing the steps completed after it, and sealing interior wood or choosing plywood introduces health hazards the moment the cabin heats up.
| Build Phase & Component | Upfront Cost | Failure Mode & Consequence | Remediation / Retrofit Cost |
| Warm-side 6-mil polyethylene vapor barrier | $50 | Moisture migrates into framing; wall-cavity mold develops within 6 to 12 months | $10,000 to $30,000 (vendor-published mold remediation) |
| Foil-faced insulation (vs standard fiberglass) | $150 | Infrared passes through fiberglass; heat-up drags from 12-18 minutes to 35-45 minutes | $3,200 average retrofit (includes $2,500 to $4,000 tear-out) |
| Licensed electrician under NEC Article 424 | $200 to $800 | Undersized wire overheating, electrical fires, burns, and voided homeowner insurance | $2,000 to $5,000 to open walls and rewire |
The $50 vapor barrier vs 10,000-30,000 mold problem
Installing a 6-mil polyethylene vapor barrier on the warm side of the wall cavity costs roughly $50 and prevents $10,000 to $30,000 in vendor-published mold remediation costs. Even dry infrared sessions generate heavy perspiration that raises cabin humidity. If you omit the polyethylene sheet before nailing up the cedar, that moisture pushes into the dark framing cavity, condensing against cooler exterior studs and breeding structural mold within 6 to 12 months.
Foil-faced insulation and heat-up time
Foil-faced insulation costs roughly $150 upfront and prevents a $3,200 average retrofit bill that includes $2,500 to $4,000 in demolition and tear-out labor. Standard pink fiberglass slows conductive air transfer, but infrared energy passes straight through fiberglass into the studs. Foil-faced insulation reflects radiant heat back into the cabin and cuts preheat times from 35-45 minutes to 12-18 minutes. Once the tongue-and-groove interior is nailed in place, fixing a slow-heating cabin means ripping out the wood walls to reach the studs.
Electrical: NEC Article 424 and the dedicated circuit
A built-in infrared sauna requires a dedicated electrical circuit, 120V/20A for smaller cabins or 240V/30A to 50A for larger multi-person builds, installed under National Electrical Code (NEC) Article 424, which governs fixed electric space-heating equipment rather than standard household appliances under Article 422. Paying a licensed electrician $200 to $800 during rough-in prevents $2,000 to $5,000 in post-construction rewiring and protects your homeowner insurance coverage.
Uncertified DIY sauna wiring is directly linked to burns, house fires, and voided policies. In one documented failure pattern, a homeowner wired a sauna onto an existing 15A bedroom circuit; when the breaker repeatedly tripped, they swapped in a higher-amperage breaker onto the same undersized 15A romex wire. That mistake removes the overload protection, leaving the hidden wire inside the wall to overheat silently until the framing ignites.
Prefab vs kit vs DIY vs turn-key: cost and warranty compared
Custom infrared sauna builds cost $6,000 to $17,000 installed as a pre-engineered kit or $8,000 to $20,000+ for a turn-key contractor build, whereas prefabricated cabin units run $3,000 to $8,000 and raw DIY materials run $3,500 to $6,500 (installation and material prices vary by region and scope). If you have a rectangular spare room and a strict budget, a prefab cabin (which often bundles chromotherapy and halotherapy add-ons) gets you into a sauna fastest, though you pay for delivery, wiring, and placement on top of the sticker price.
However, custom kits carry a 7-year warranty and engineer the heater coordinates around your bench, whereas prefab units lock in fixed dimensions and fixed heater geometry at the factory before anyone considers your body’s dose.
What each build path costs, and what warranty it carries
A prefab cabin is an off-the-shelf box; a custom build is a tailored rig. If you have a standard rectangular room, buy the prefab. Pay for custom engineering only when your space, budget, or dosing geometry demands it. Custom builds earn their premium in irregular rooms, awkward basement corners, closet conversions, and commercial spaces where architects and contractors can upload CAD files to integrate the sauna into the broader renovation plan.
| Build Path | Upfront Cost | Labor & Timeline | Warranty Coverage | Heater Geometry Control |
| Prefab Cabin | $3,000 to $8,000 (plus delivery and wiring) | 1 to 3 days on-site assembly | Partial (varies by manufacturer) | No (fixed factory dimensions and panel mounts) |
| Custom Kit | $6,000 to 17,000 installed 5,000-$15,000+ kit, 500-2,000 carpenter, 200-800 electrician) | 8 to 12 weeks from design to install | 7-year warranty | Yes (engineered to room, bench, and body coordinates) |
| Turn-Key Custom | $8,000 to $20,000+ all-in | 8 to 12 weeks (contractor-managed) | 7-year kit warranty (plus contractor workmanship terms) | Yes (full CAD integration with architect files) |
| Scratch DIY | $3,500 to $6,500 (materials only) | 40 to 100+ hours of personal labor | 90-day component warranty at best | No (generic plans lack coordinate dosing math) |
Portable infrared saunas with red light therapy aren’t a viable substitute for a custom build because their compact, fixed frames lock in heater and light panel distances without engineering around your seated geometry. While manufacturers don’t publish dosing performance specs for portable tents and domes, any portable enclosure inherits the same fixed-dimension constraints as a prefab box at an even tighter scale.
When DIY works: the Andrew Szeto counterexample
Building an infrared sauna yourself saves money on the upfront materials invoice ($3,500 to $6,500 plus 40 to 100+ hours of labor), but it loses to a $6,000 to $17,000 installed custom kit on total cost of ownership, warranty protection, and session dose. A custom kit includes pre-engineered L3-L5 heater coordinates and a 7-year warranty, whereas a scratch DIY build carries a 90-day component warranty at best, produces a generic hot box without proximity dosing math, and exposes an inexperienced builder to $10,000 to $30,000 moisture or electrical failures. Unprepared homeowners routinely misprice their own time, such as the cautionary “Marcus” example of budgeting a single 48-hour weekend for a build that requires up to 100+ hours.
Scratch DIY makes financial sense only if you already possess advanced carpentry skills, track every fastener, and value the craft at zero dollars per hour. In 2019, builder Andrew Szeto constructed a 7×7 ft A-frame cabin sauna from scratch in Wakefield, Quebec, logging roughly 200 hours of labor and $5,581 in total expenses on a public cost spreadsheet. Szeto kept material costs down by skinning the exterior in upcycled skateboards and spent $2,700 CAD, roughly 40% of the entire budget, on a traditional HUUM Hive Heat 12 stone stove, proving that even when labor is free, the heating core dominates the capital allocation.
Sauna wood choices: cedar consensus and the Hemlock dispute
Clear-grade, kiln-dried Western Red Cedar tongue-and-groove is the consensus best interior wood for an infrared sauna because of its natural moisture resistance and aroma, governed by two strict safety rules: never apply sealants, stains, or paint to interior cedar, and never use plywood inside a sauna because its urea-formaldehyde adhesives off-gas carcinogens when heated. Beyond cedar, wood recommendations depend on which vendor you ask, and maintenance requirements vary by species over the life of the cabin.
- Western Red Cedar (clear, kiln-dried): Endorsed across builders for moisture resistance and scent; included in premium custom kits.
- Hemlock: Disputed. SaunaCloud states that Hemlock warps and lacks antimicrobial properties, whereas Finnish Sauna Builders describes Hemlock as durable, air-quality-neutral, and a standard legitimate option in Finnleo custom kits.
- Nordic White Spruce: Offered in Finnleo kits alongside Cedar and Hemlock; its pale tone makes compact rooms feel larger.
- Basswood, Poplar, and Pine: On SaunaCloud’s avoid list, with the vendor stating that Basswood degrades, Poplar splits, and Pine leaks sap.
When comparing custom kit manifests, such as an InfraSauna package (which adds a traditional Finnish heater with guard, bucket, and ladle) or a custom panel kit, ignore the brochure adjectives and audit the unglamorous bill of materials. A complete kit should specify pre-cut tongue-and-groove walls and ceiling, fitted benches, duckboard flooring, a door with handle, molding, a foil-faced vapor barrier, a vent valve, grills, RGBW puck lights, and a SaunaLogic2-IS Wi-Fi controller, with optional windows, bench skirts, or a Bluetooth soundbar itemized cleanly.
Built-in and flush-mount integration: installer realities
Integrating a sauna into a bathroom, closet, master bath, wellness studio, or garage gym renovation requires selecting the exact sauna model before framing and electrical rough-in begin, while meeting minimum site specs: a 4×4 ft interior footprint for one person (4×5 or 5×5 ft for two; 5×6+ ft for three or more), a 6.5 ft minimum ceiling height (7 to 8 ft ideal), and placement within 50 feet of the main breaker panel to control wire run costs. As installer Matt Justice documents on the Certified Saunas YouTube channel and in the 48,000-member Certified Sauna Facebook group, most flush-mount headaches happen because contractors frame the alcove before checking the unit’s physical profile.
Door swing, side windows, and front profile decide recessing
Your sauna’s front profile, door hinges, and side windows dictate how deeply it can recess into a wall. Corner-hinged doors with magnetic strips, such as those on Sunlighten corner-door models, can’t recess past the door swing and can’t take flush face trim, meaning they must hang out slightly from the wall. Side windows recessed into an alcove stare directly into raw wall studs unless you black out the glass, paint the cavity, or let the cabin protrude past the window line. Conversely, flat-face models without side windows, such as Heavenly Heat units, countersink cleanly so rock tile can finish flush to the door frame.
Units with curved valance panels require complex tapered, scribed trim and often look cleaner hanging out 5 to 6 inches. Clearlight Sanctuary 1-to-2-person models feature ceiling glass above a bulkhead over open framing, which requires either skirting the bulkhead with drywall or plywood, painting it black, or letting the cabin hang out 8 to 12 inches (Justice is also testing two counter-sink methods side by side across 1-, 2-, and 3-person gym builds).
Pigtails and outlet height before rough-in
Electrical outlet height must match the specific sauna model’s power pigtail location before the walls close. Placing the receptacle halfway up the wall accommodates either a roof pigtail or a floor pigtail, whereas wiring a standard low wall outlet can leave a roof-pigtail model stranded short of the plug, forcing an unbudgeted drywall tear-out and rewiring job.
Moisture, ventilation, and wet-vs-dry installs
Dry infrared saunas require no floor drains, plumbing, waterproof flooring, or active exhaust fans, but placing a thin, uninsulated budget sauna inside a sealed wall cavity creates thermal bridging that slows heat-up and breeds condensation unless you insulate the cavity with at least 2 inches of foam. In one Maine bathroom remodel, the homeowner insulated a counter-sunk sauna cavity with 2-lb closed-cell spray foam and downsized the cabin footprint rather than compromise the adjacent shower layout.
Because a closed sauna is an unconditioned space, wet traditional steam use or tight sauna-shower adjacency requires active humidity control and ventilation fans mounted at the high point of the room, where rising moisture gets trapped, and excess humidity must never dump into unventilated ceiling cavities; bring these specs to your general contractor during initial planning.
Outdoor and commercial engineering: the Alphasauna case
Outdoor and commercial custom saunas installed on decks, patios, courtyards, hotels, and spas depend on structural water drainage and ground clearance rather than interior trim for their working life. While traditional outdoor cabins pair a curved roof with a wood or fiberglass base, Alphasauna engineers its outdoor infrared units with a corrosion-resistant black spray-painted finish, a sloped roof featuring a roughly 100 mm height differential for rainwater runoff, and elevated support feet for under-floor ventilation against rising damp, alongside vendor-published claims of lightweight far-infrared mica board heaters, auxiliary infrared tube preheaters, full supply-chain integration (including ice baths), 100% pre-assembly inspection, BSCI certification, and 10+ years of R&D led since 2014 by founder Mr. Mark (formerly of the China Aerospace Department and Huawei).
Smart controls and the wellness experience layer
Smart Wi-Fi controllers and sensory upgrades are easily copied commodity features across every price tier, not the engineering variables that separate a clinical custom build from an entry-level box. While manufacturers point to app-enabled preheating via a Smart WiFi Sauna Control System or SaunaLogic2-IS, CORE 5 power supplies, built-in Bluetooth audio, under-bench and overhead multi-color LED lighting, Medical Grade Chromotherapy (96 LEDs across 12 color settings), AROMA ONE aromatherapy, and HALO ONE halotherapy as proof of a market shift toward personalized wellness routines, stacking gear in a room isn’t designing it to work together, the more modalities you combine, the more placement decisions matter, and none of that electronics package fixes a missed vapor barrier or a heater mounted 24 inches from your back.
How to read a spec sheet and choose a builder
Infrared saunas support long-term wellness habits when used at the 4-to-7-sessions-per-week frequency established in Finnish research, and while it’s accepted physics that human tissue absorbs far infrared most efficiently in the 7 to 10 micron band, specific equipment numbers, such as SaunaCloud’s claim that its VantaWave heaters peak at 7.9 microns with under 0.20 mG EMF, remain unverified vendor claims until backed by independent lab reports. Following SaunaCloud’s own buyer guidance, treat every manufacturer’s brochure with skepticism and demand full spec sheets and third-party testing data before paying a premium for wavelength or EMF figures.
When selecting a custom builder or regional installer, such as Finnish Sauna Builders of Deerfield, Illinois (where Lisa Appleby is on record), which manages delivery, setup, and installation across Chicago, Milwaukee, and the Midwest, vet them like a general contractor rather than a retail store. Verify their active licenses, insurance, online reviews, past custom project referrals, CAD sign-off workflow, post-installation support, and written warranties covering both materials and workmanship, and confirm whether they process 0% 12-month HSA/FSA financing through TrueMed if you plan to deploy pre-tax health dollars.
Frequently Asked Questions
1. Can you build an infrared sauna yourself and is it worth it?
You can buy raw materials for $3,500 to $6,500 and spend 40 to over 100 hours building from scratch, but it rarely beats a $6,000 to $17,000 installed custom kit on total value or performance. A scratch build leaves you with a 90-day component warranty at best, zero coordinate-mapped dosing math, and personal financial exposure to $10,000 to $30,000 mold or electrical mistakes. Unless you have advanced carpentry skills and value your own labor at zero, like builder Andrew Szeto, who logged 200 hours and spent $5,581 in 2019 on a 7×7 ft A-frame, a pre-engineered kit with a 7-year warranty is the smarter play.
2. How much does a custom infrared sauna cost compared to prefab?
Off-the-shelf prefabricated cabins cost $3,000 to $8,000 before delivery and electrical hookup, whereas pre-engineered custom kits run $6,000 to $17,000 installed and contractor-managed turn-key builds reach $8,000 to $20,000 or more (with labor and material prices varying by region and scope). Prefab boxes are the right call for a standard rectangular spare room on a strict budget, even though their factory dimensions and panel mounts are locked in place. Custom builds earn their price premium when you need a 7-year warranty, CAD integration for an awkward space, and heater coordinates mapped directly to your bench and body.
3. What are the biggest mistakes to avoid when building a custom infrared sauna?
The costliest disasters come from skipping cheap rough-in materials before closing the walls: omitting a $50 6-mil polyethylene vapor barrier on the warm side invites $10,000 to $30,000 in mold remediation within 6 to 12 months. Using standard pink fiberglass instead of $150 foil-faced insulation lets radiant energy pass straight into the studs, dragging preheat times from 12-18 minutes out to 35-45 minutes and costing an average of $3,200 to tear out and fix. Inside the cabin, never use plywood, which off-gasses carcinogenic urea-formaldehyde adhesives when heated, and never apply stains, paint, or sealants to interior wood.
4. How long does it take to design and build a custom infrared sauna?
Based on a May 2024 vendor timeline for Clearlight and Finnleo, a dealer-built custom infrared sauna takes 8 to 12 weeks from initial room measurements to final installation. That schedule breaks down into roughly 5 days for initial consultation and CAD drafting, about a month for 2 to 3 rounds of revisions and final CAD sign-off, and 6 to 8 weeks for manufacturing and shipping. Once the kit arrives on-site, a licensed carpenter and electrician typically finish the physical build in 1 to 3 days.
5. Is a portable infrared sauna with red light therapy a good alternative to a custom build?
No, portable tents and domes are not a viable substitute for an engineered cabin because their compact, fixed frames lock in heater and light distances without accounting for your seated geometry. While vendors rarely publish dosing specs for portable units, any collapsible enclosure suffers from the same fixed-dimension compromises as a prefab box on an even tighter scale. If you want clinical-proximity red light (2 to 6 inches from the skin) and targeted lumbar coverage, you need a rigid cabin mapped to your bench dimensions.