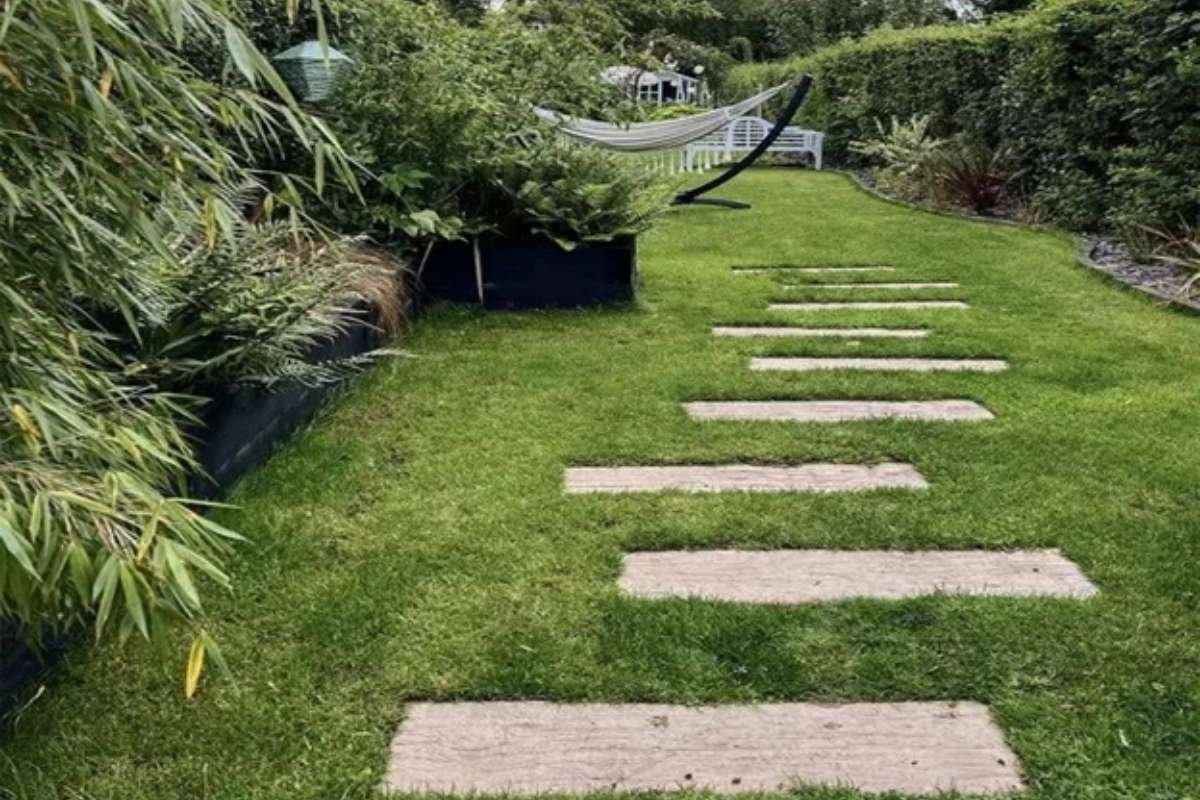
A strong outdoor walkway adds order while guiding movement across planted spaces. Thoughtful planning helps connect green areas with a smooth direction while keeping effort manageable. Many homeowners prefer natural materials that blend with soil tones while lasting through changing weather. Careful selection of timber shapes results in a balanced layout that supports daily use. With simple tools and steady steps, the project stays achievable for beginners. Each stage builds confidence while shaping a structured route that supports outdoor routines. Clear preparation ensures the surface stays firm while improving overall ground appearance for years.
9 Steps to Create a DIY Garden Path with Sleepers
1. Planning Path Layout
Before starting, mark the intended route with ropes or chalk lines. Decide the width based on foot movement and surrounding growth patterns. Straight lines offer formal order while gentle curves create a relaxed flow. Measure distances carefully to limit material waste. Confirm the ground slope to avoid water collection later.
2. Choosing Sleeper Material
- Select treated timber pieces that resist moisture, pressure, soil contact, and long-term outdoor wear
- Prefer uniform thickness lengths to maintain a steady walking height across the full route
- Inspect surfaces closely to avoid cracks, splinters, or weakened edges during placement
3. Ground Preparation Steps

Strong foundations protect the DIY garden path with sleepers from sinking or shifting. Begin by removing surface growth and loose soil. Dig to a consistent depth that allows base layers and timber height. Compact the earth firmly using simple tools. Add a gravel base to improve drainage and support weight evenly. This stage sets the structure for placing garden sleepers securely while reducing movement over time.
4. Base Layer Setup
- Spread crushed stone evenly to support the weight without trapping excess moisture beneath the timber
- Level the base carefully using straight boards for balanced alignment before sleeper placement
5. Sleeper Placement Method
Lay each timber section slowly while checking alignment often. Place pieces close together with minimal gaps to prevent tripping risks. Use a rubber mallet to settle each sleeper firmly. Recheck the level after every addition to maintain a smooth walking surface. Adjust the base material where needed rather than forcing timber into place.
6. Securing The Path

Once aligned, fix the sleepers to prevent shifting. Drive long stakes or rods through pre-drilled holes into the base below. Ensure fasteners sit below the surface to protect footwear. Backfill sides with soil or gravel and compact gently. This locking method keeps the DIY garden path with sleepers stable during regular use and seasonal changes.
7. Finishing Touch Details
- Fill side gaps with soil blend supporting nearby plants while strengthening edge structure
- Brush surfaces clean to remove debris, improving grip and visual order across the walkway
- Apply protective coating to extend timber life against moisture, sun exposure, and surface wear
8. Maintenance And Care

Routine care protects your effort and keeps the walkway reliable. Sweep dirt often to reduce surface wear. Check fasteners yearly and tighten if movement appears. Refresh protective layers when timber fades. With steady upkeep, the path retains strength while blending naturally with surrounding growth.
9. Timeless Garden Route
A well-built walkway supports movement while shaping outdoor order with lasting strength. Each step from planning to finishing builds a reliable surface that handles daily use. Proper groundwork, careful alignment, and firm fixing reduce future repairs. Regular care keeps timber healthy while protecting the structure. Using a DIY garden path with sleepers wisely allows homeowners to achieve a balanced route that feels natural underfoot. This method offers a clear solution for anyone seeking durability with simple construction methods and lasting visual harmony.