Managing users and customers is a big part of running a WooCommerce store, especially as your store grows. Whether you’re moving to a new website, backing up customer data, updating user details in bulk, or syncing customers between multiple stores, doing everything manually can quickly become time-consuming and error-prone.
That’s where import export WooCommerce users comes in handy. Instead of editing one customer at a time, you can use simple files like CSVs to move, update, or back up user and customer data all at once. WooCommerce makes this possible, and with the right tools, the process becomes fast and hassle-free.
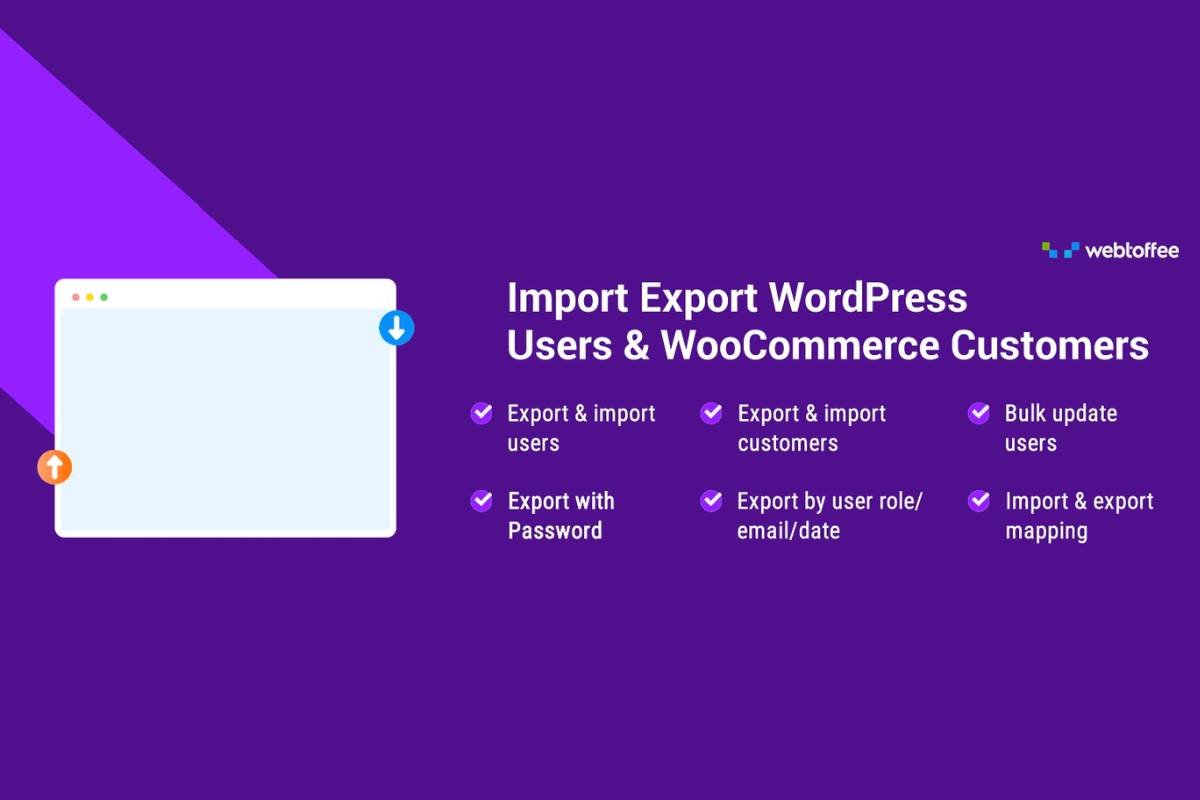
In this guide, we’ll walk you through how to easily import export WooCommerce users and customers with the free Import Export WordPress Users and WooCommerce Customers plugin.
Exporting WordPress Users
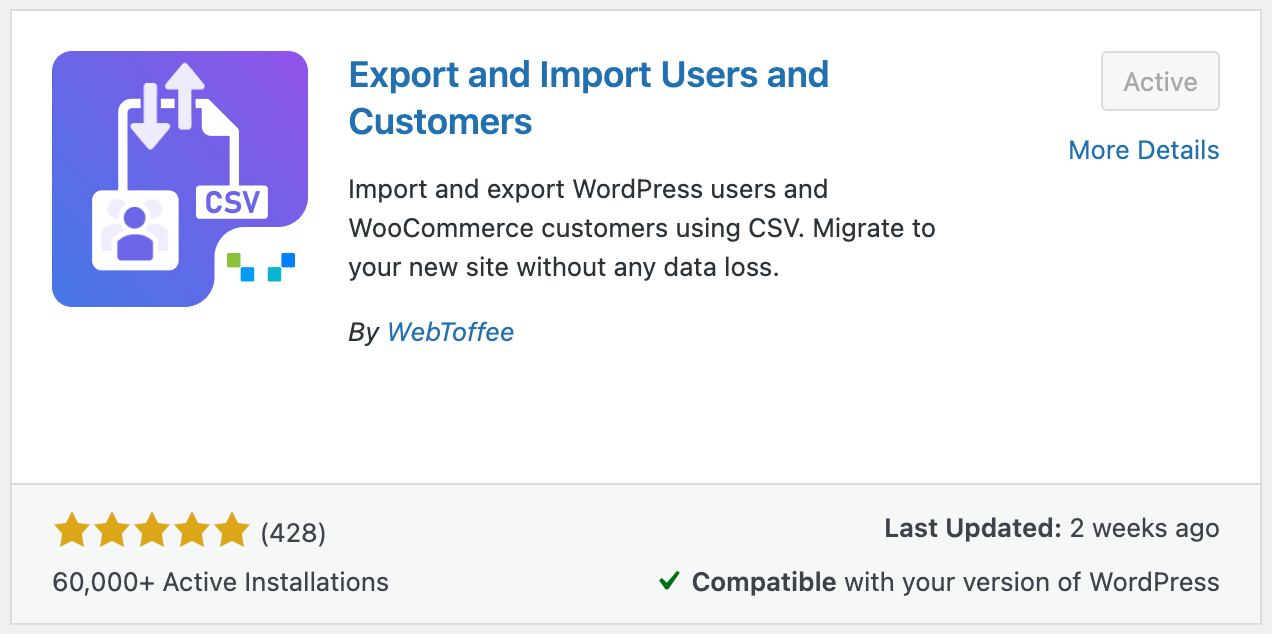
Exporting WordPress users involves two main steps: exporting user data from the source site into a CSV file, and importing that file into the destination site. Before you begin, ensure that the free WordPress User Import Export plugin by WebToffee is installed.
Step 1: Install WebToffee Import Export WordPress Users Plugin
- Log in to your WordPress dashboard and navigate to Plugins > Add New.
- Search for “Import Export WordPress Users” by WebToffee.
- Install and activate the plugin.
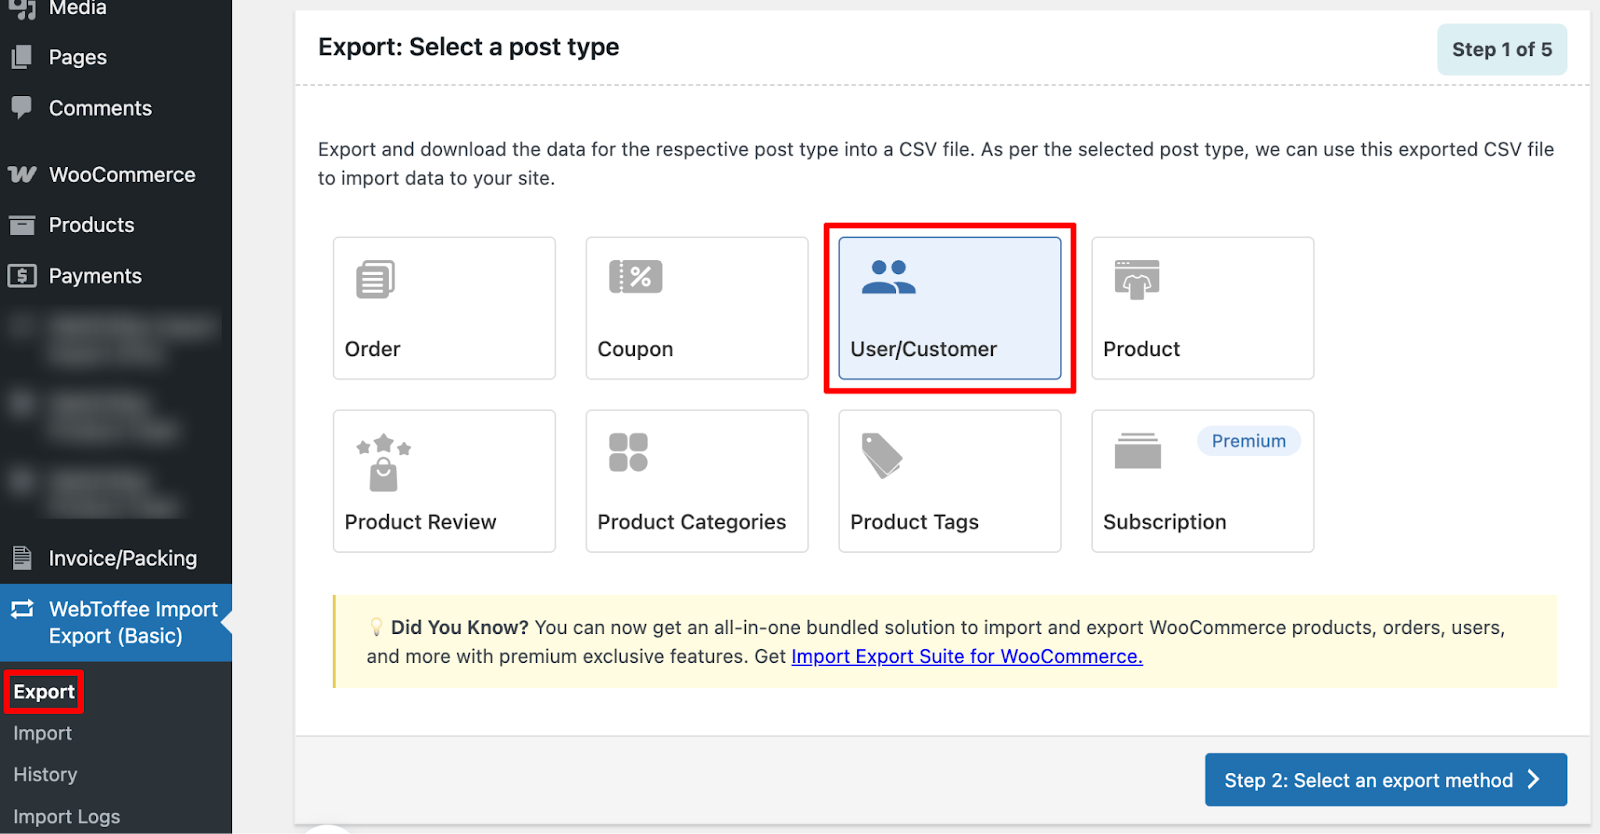
Step 2: Select User as Post Type for Export
Once you’ve installed the plugin,
- Go to WebToffee Import/Export (Basic) > Export.
- Choose User/Customer as the post type.
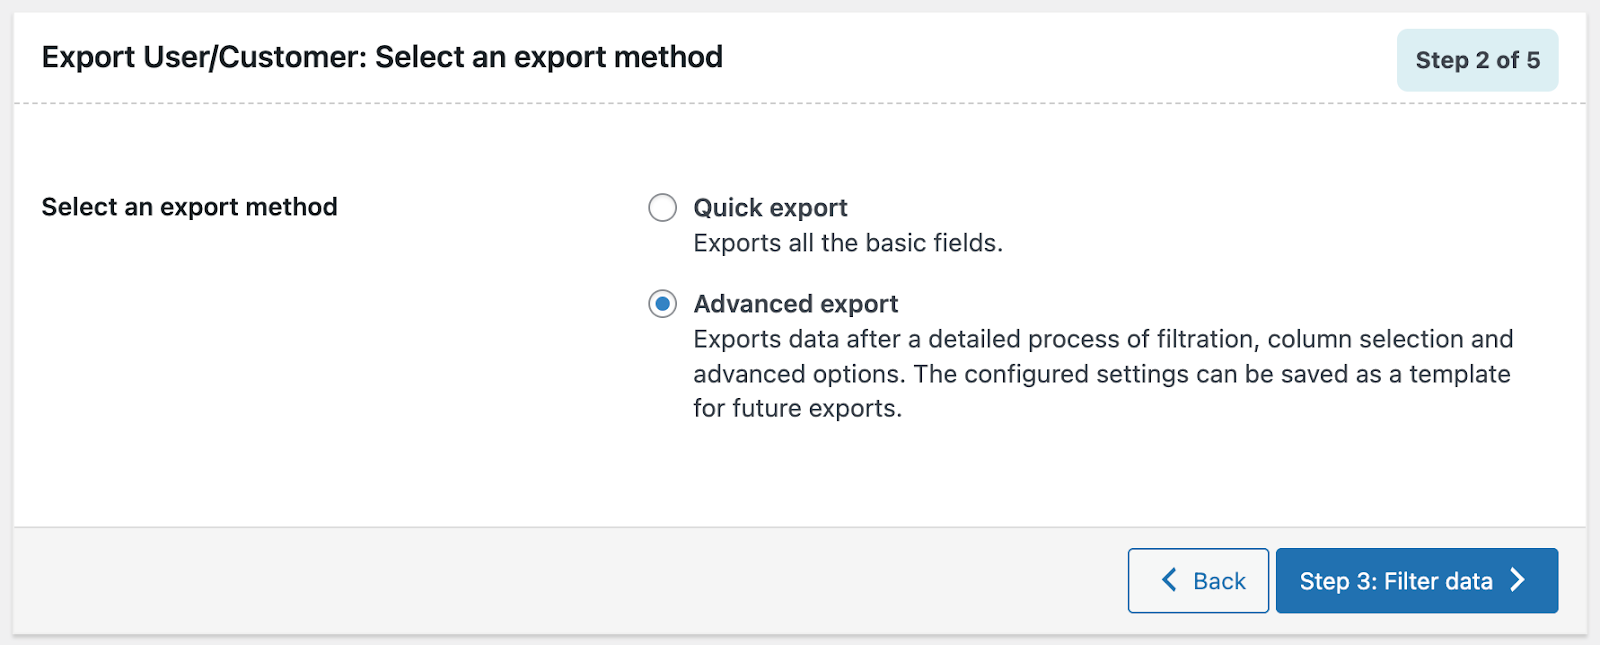
Step 3: Choose an Export Method
At this step, you’ll need to choose an export method. The plugin offers two options to match different requirements:
- Quick Export: Exports user data using the default settings.
- Advanced Export: Allows you to apply filters, select specific columns, and customize advanced options to generate a CSV file that fits your needs.
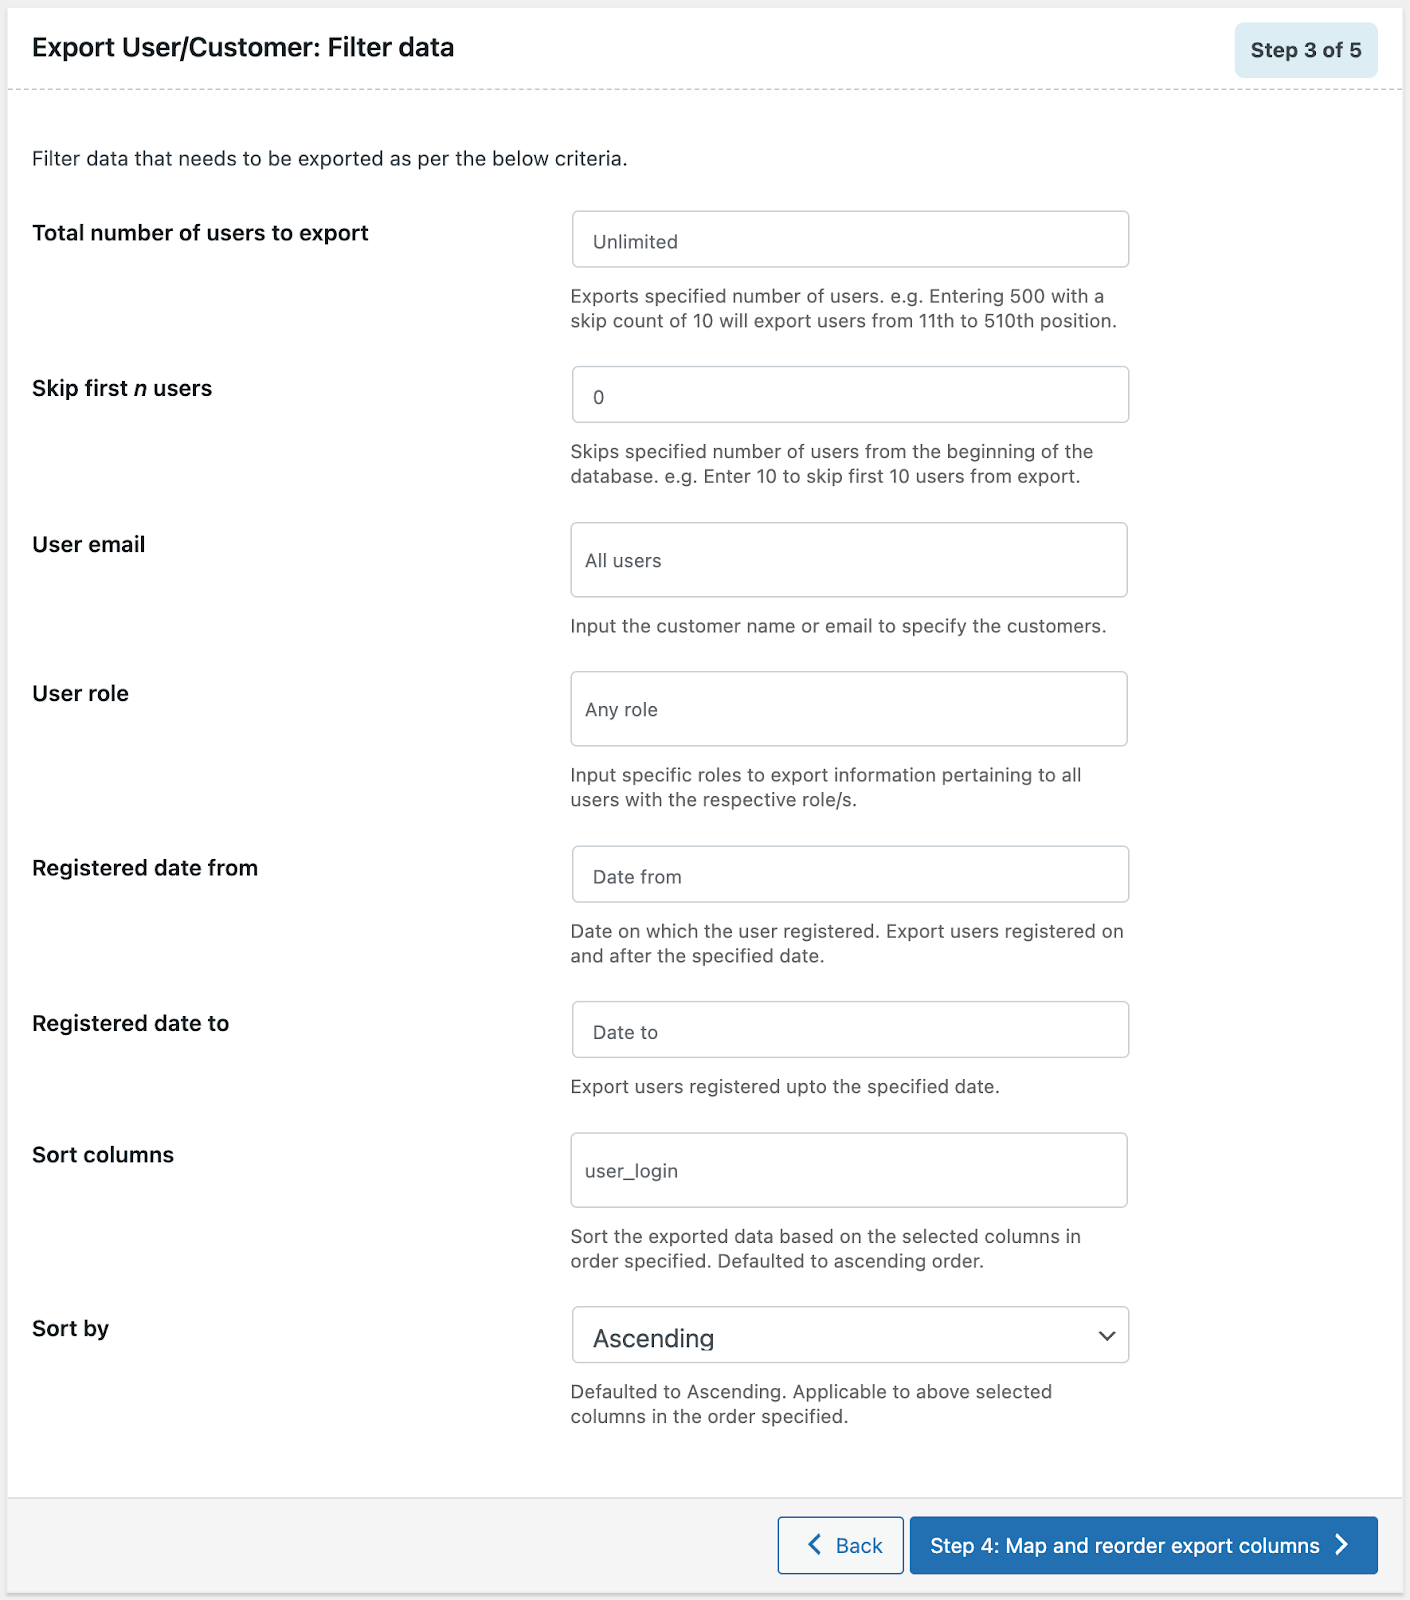
Step 4: Filter WordPress User Data
This step allows you to customize the export by applying filters. You can limit the user count, exclude specific users, or set conditions to export only relevant data.
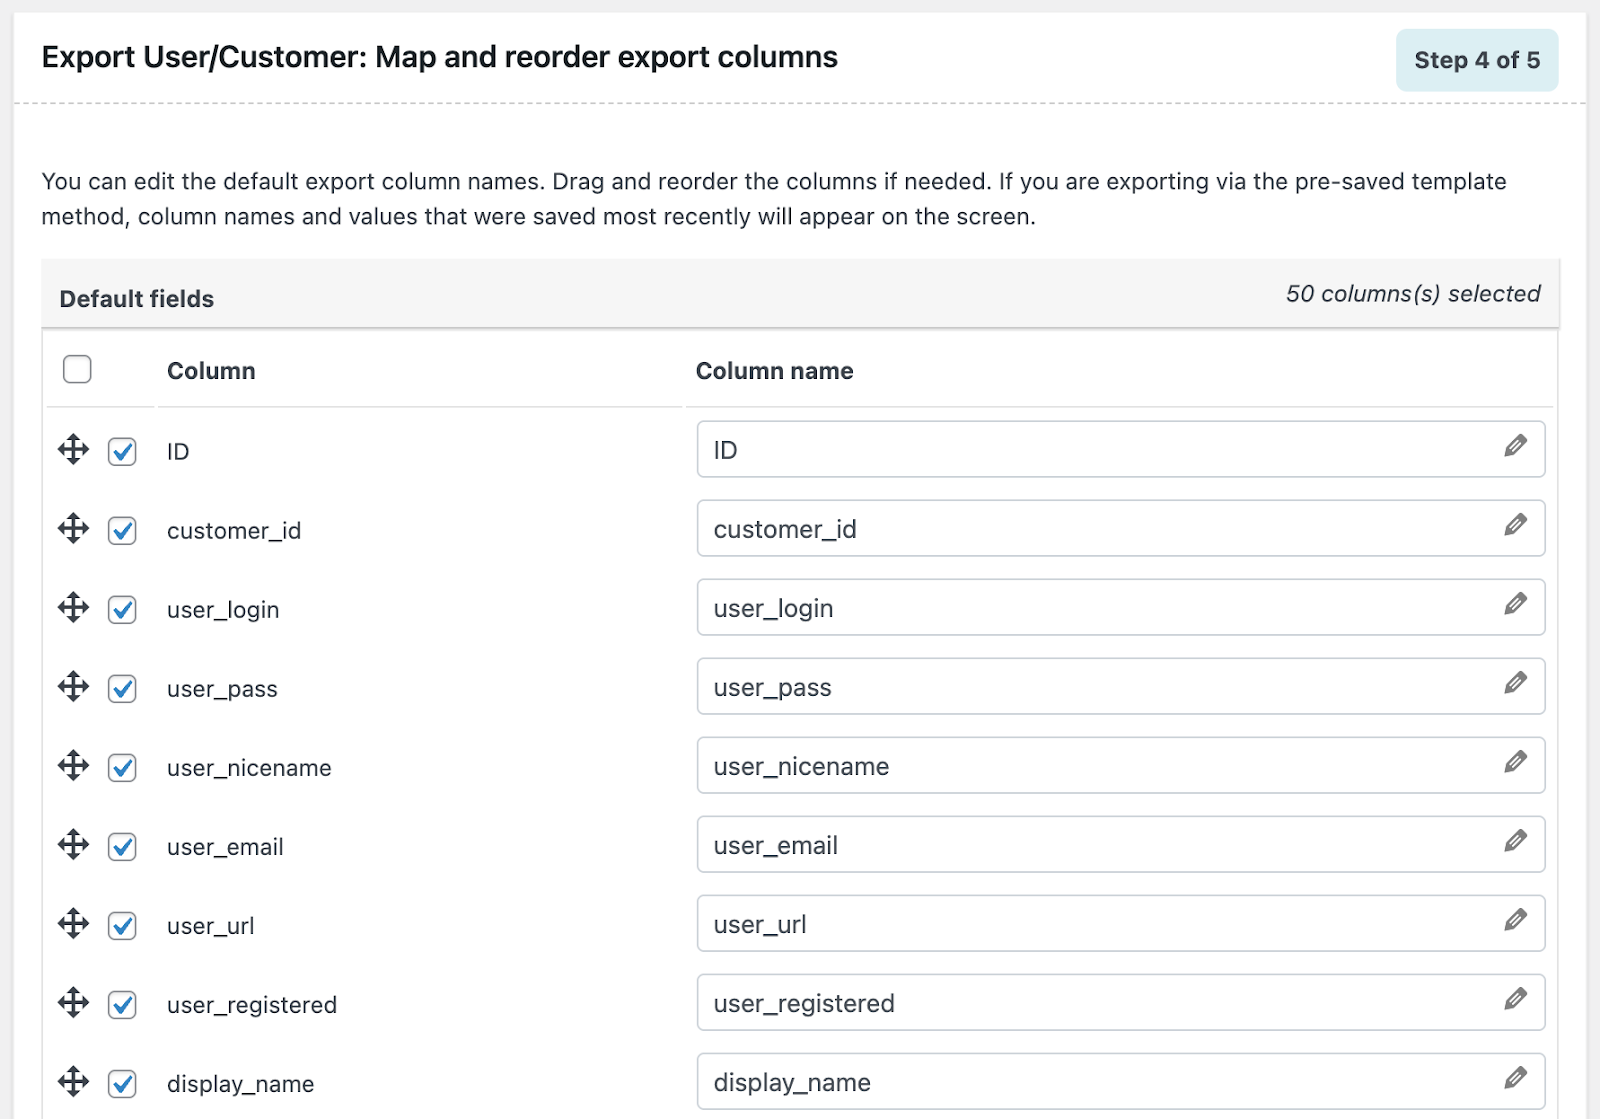
Step 5: Map and Reorder User Export Columns
Here, the plugin shows its field names alongside the CSV column names. While they match by default, you can rename the columns or change their order if needed.
Reordering columns is helpful when preparing the file for another system or improving readability.
After making your changes, move on to the next step.
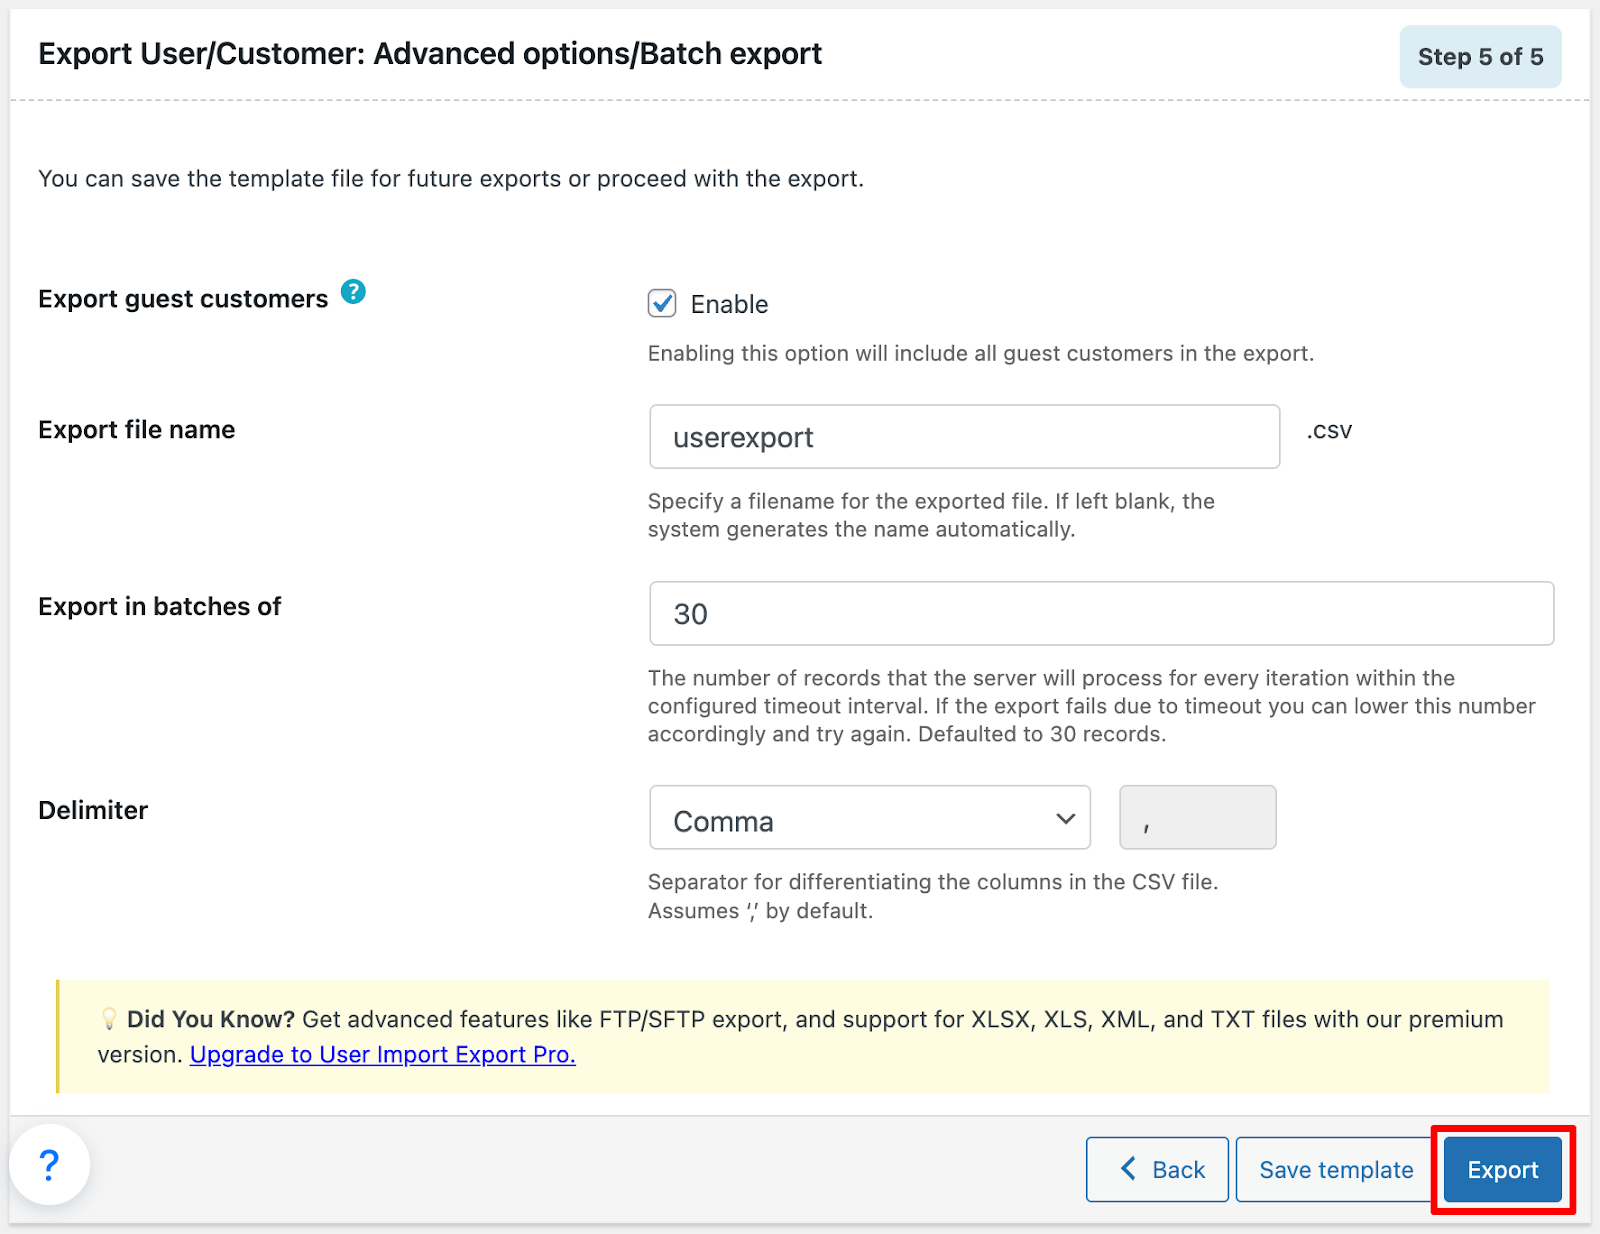
Step 6: Configure Advanced Export Options
In this step, you can fine-tune your export settings before generating the final CSV file:
- Include guest users: Enable this option if you want guest customers to be included in the export.
- Batch size: Select how many records should be processed in each batch.
- File name: Enter a name for the exported CSV file.
- Delimiter: Choose the character used to separate columns (comma is selected by default).
- Save template (optional): Save your current configuration to reuse it for future exports.
Once everything is set, click Export to generate and download the CSV file containing your users or customers.
After the export finishes, you’ll see a confirmation pop-up. Just click the Download file to save the CSV to your computer.
Importing WordPress Users
Now that your users are exported, it’s time to import them into your new site. Using the same plugin, you can bring them in with just a few clicks while keeping all your user data intact.
Let’s walk through the process.
Step 1: Select User/Customer as Post Type for Import
- From your WordPress dashboard, go to WebToffee Import/Export (Basic) > Import.
- Choose Users/Customers from the available post types,
- Click the Select import method button to proceed.

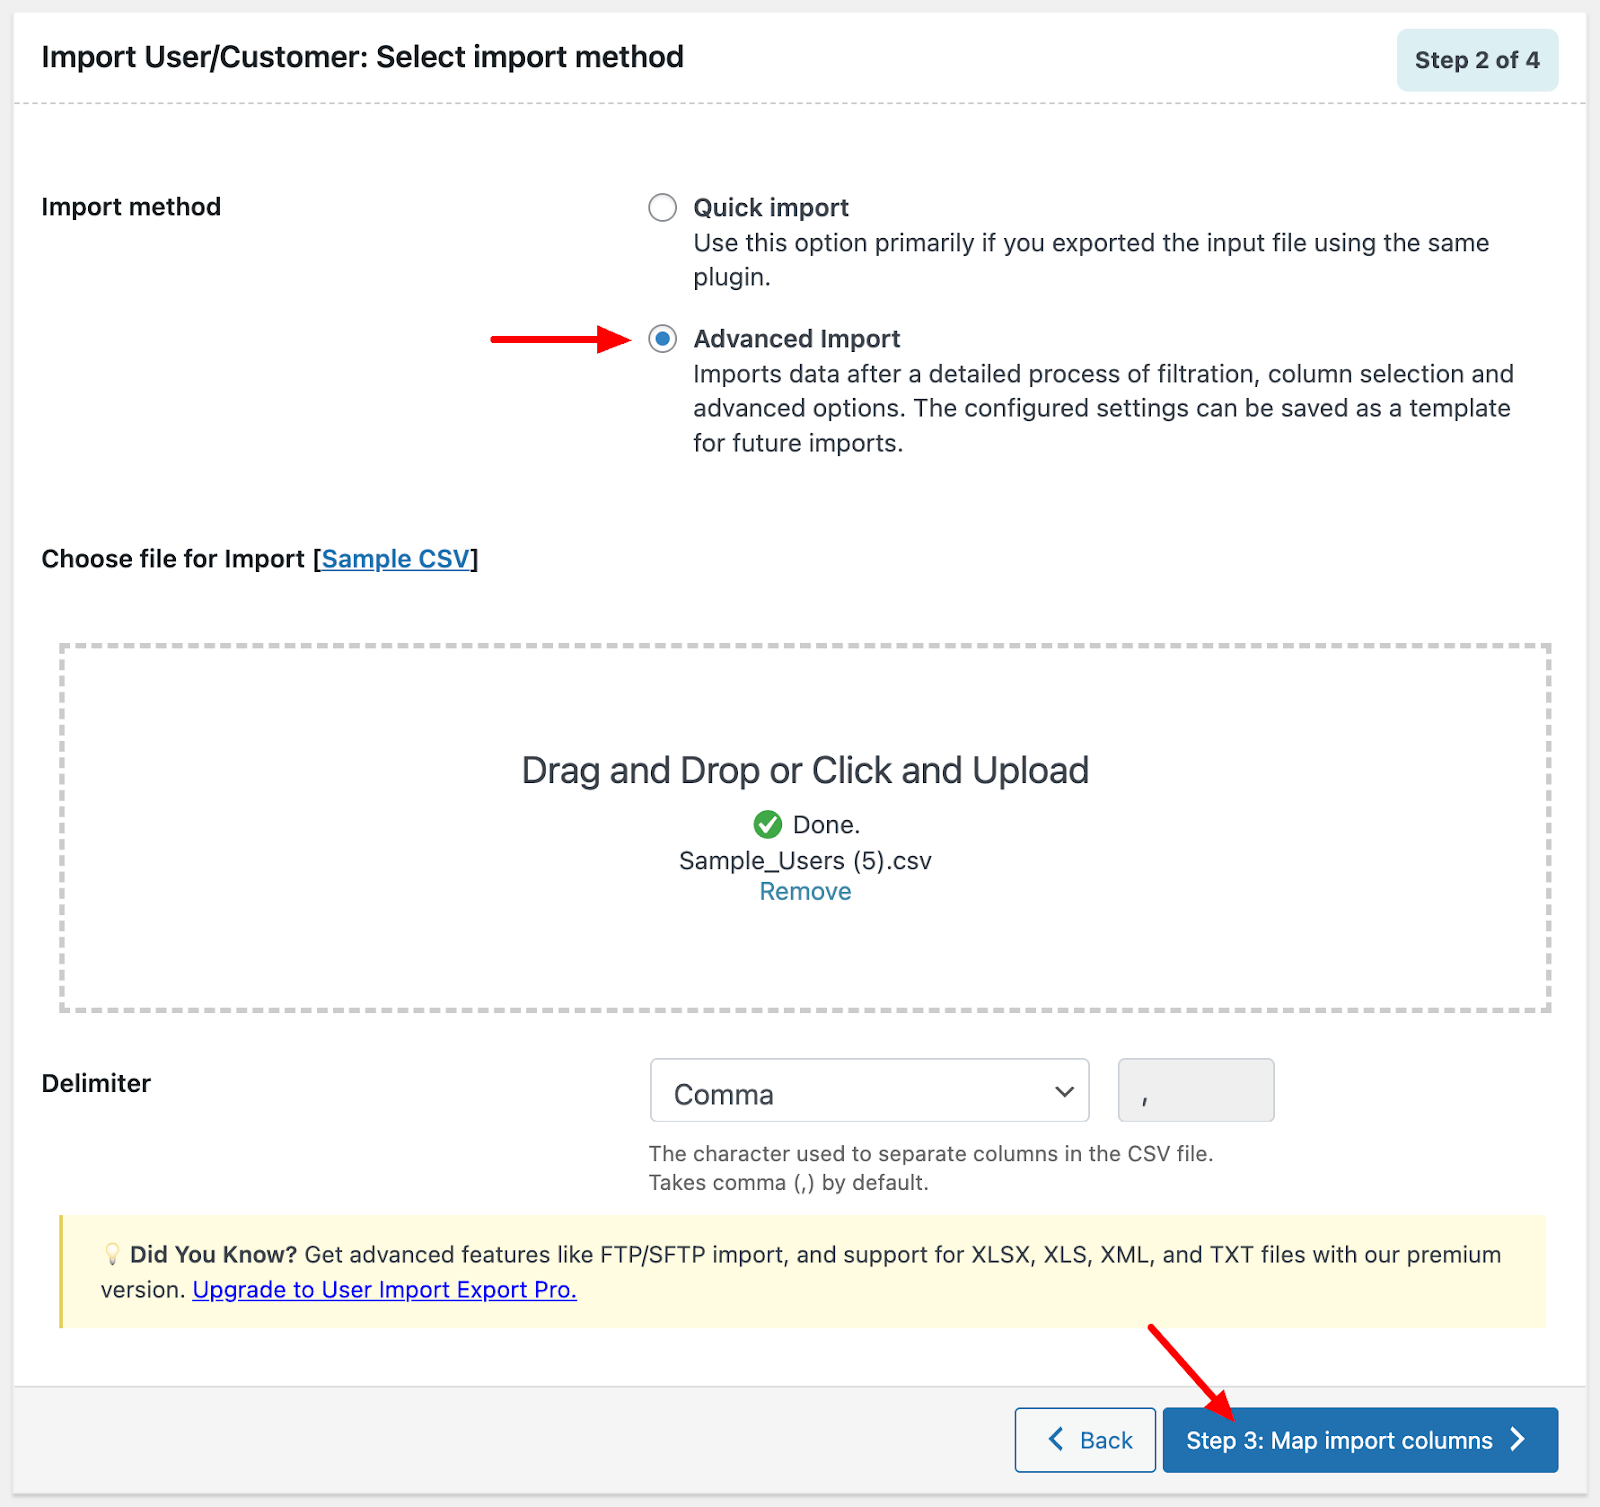
Step 2: Select Import Method
Choose your preferred import method. Similar to the export process, you can select either Quick Import or Advanced Import. For this guide, choose the Advanced Import option.
- Choose File for Import: Drag and drop the CSV file into the upload area, or click inside the box to browse and upload it from your computer.
- Set Delimiter: Specify the character used to separate columns in the CSV file (such as a comma, semicolon, or tab).
Once done, proceed to the next step of Import Export WooCommerce Users
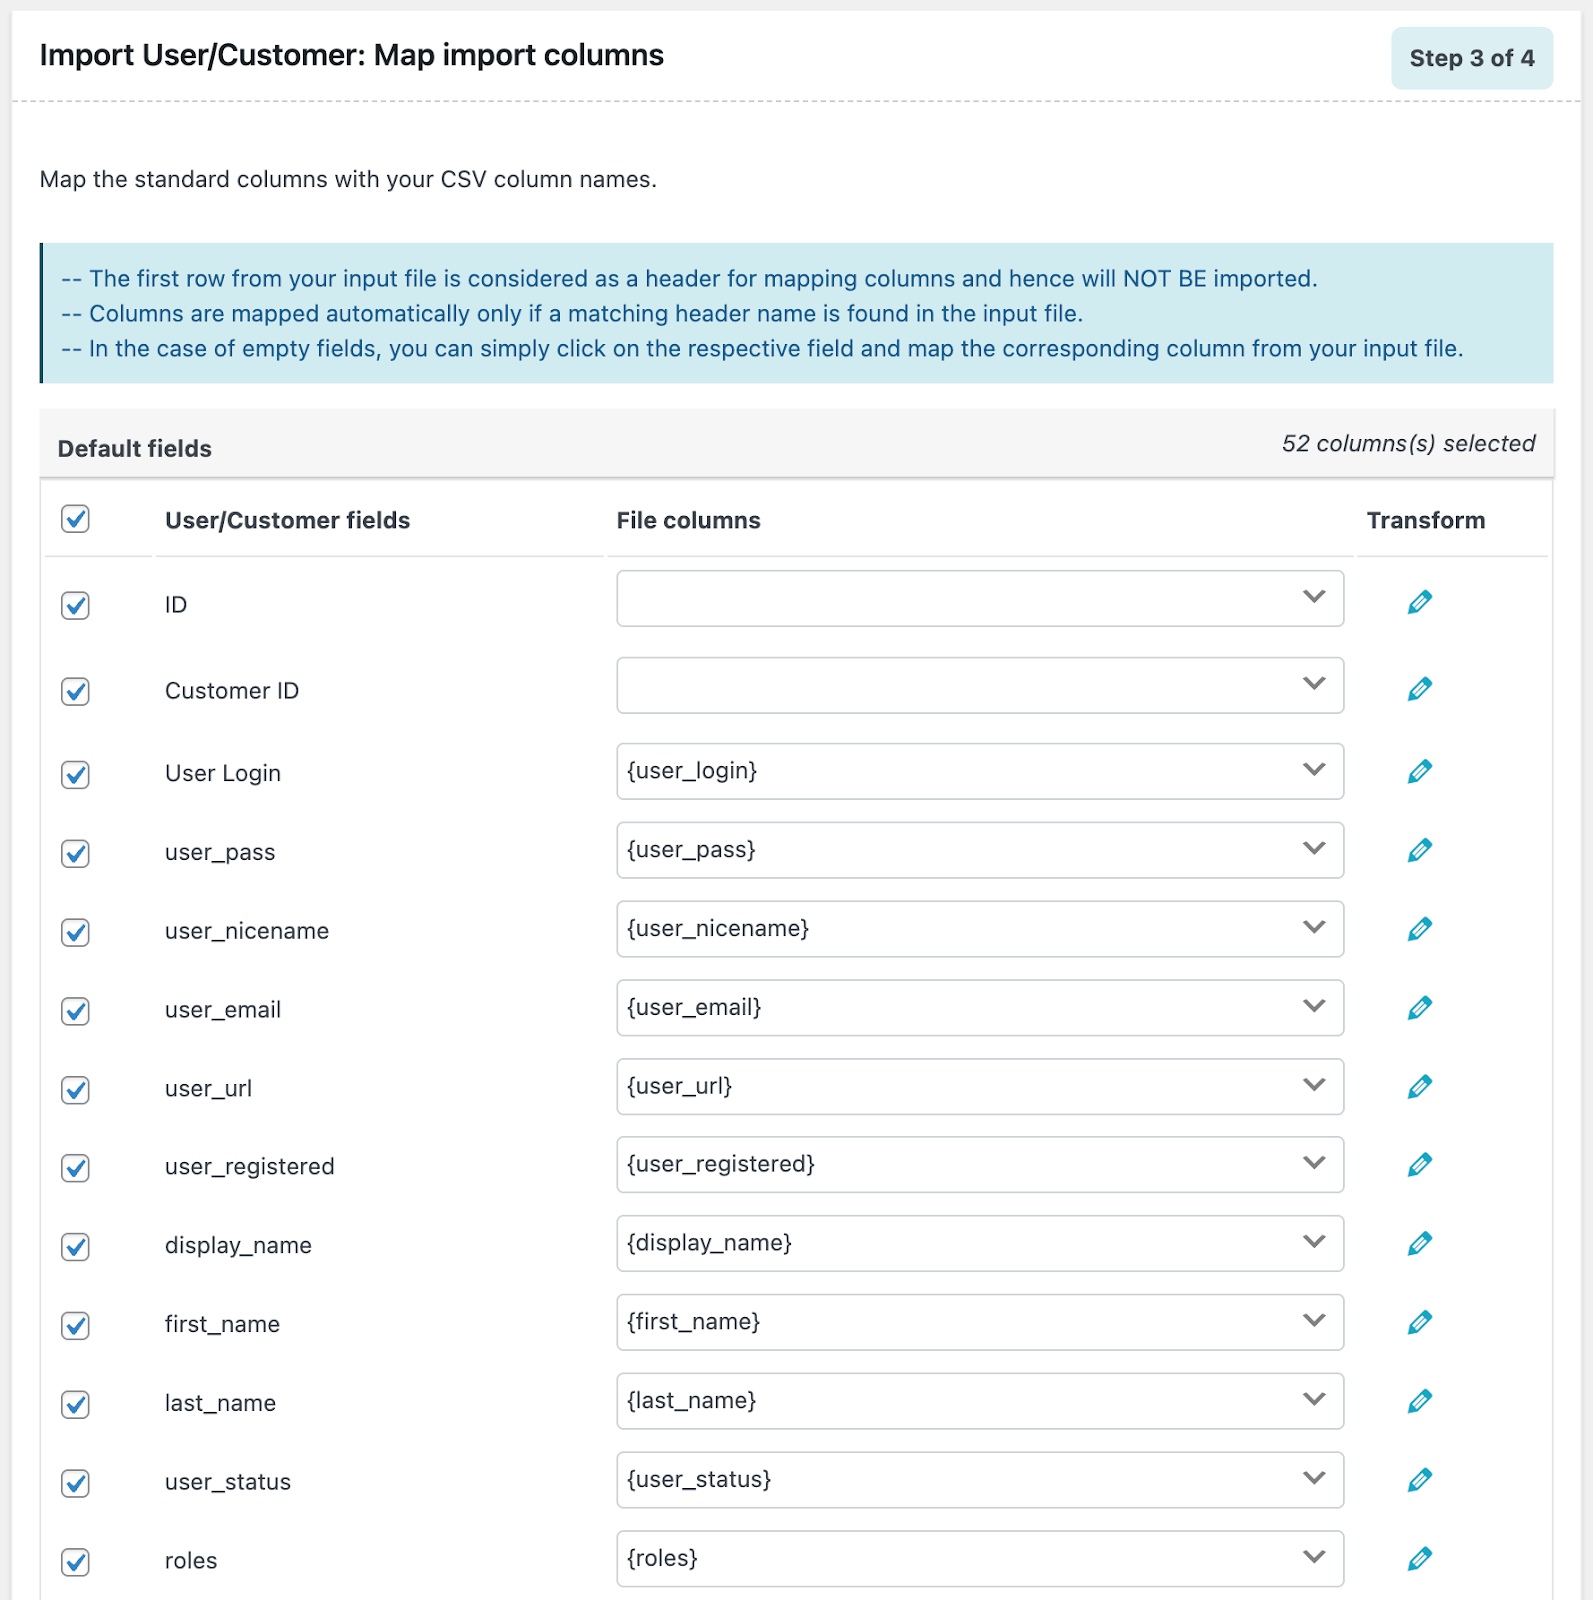
Step 3: Map Import Columns
Take a moment to review the column mappings shown by the plugin. When your CSV uses default column names, these fields are usually matched automatically.
If any columns are left unmapped, simply select the correct CSV column for each field.
After verifying everything, move on to the next step.
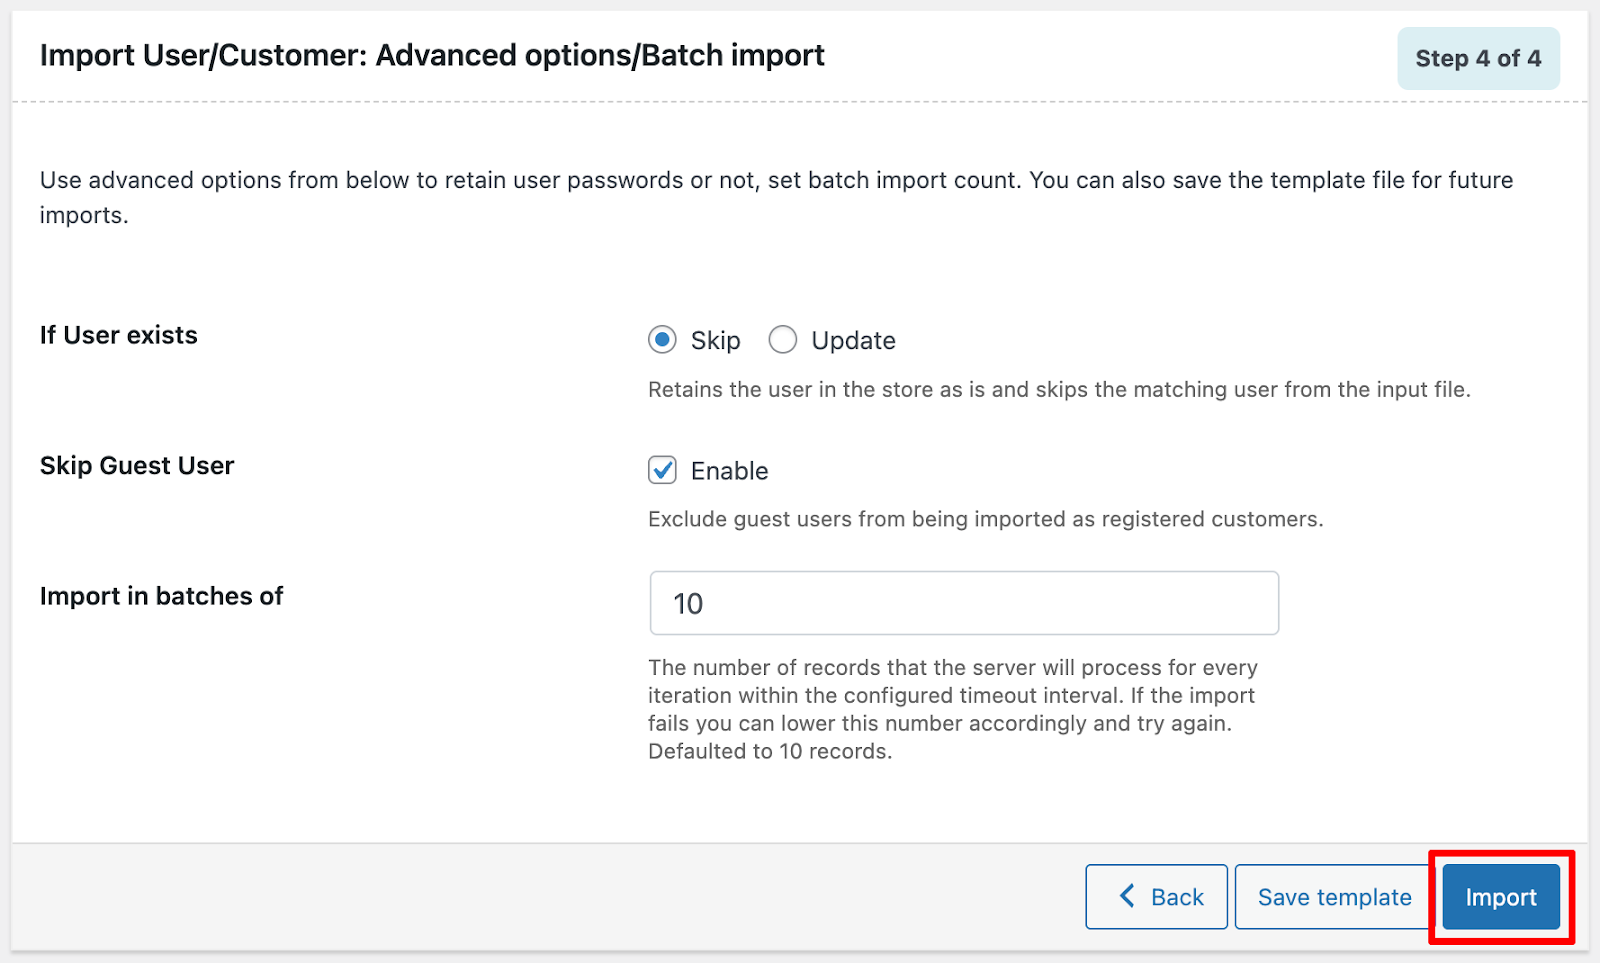
Step 4: Configure Advanced Import Options
Before completing the import, you can adjust a few advanced settings to control how the data is handled:
- If user exists: Choose how the plugin should behave when a user already exists on the site. You can either skip that user or update the existing user details using the data from the CSV file.
- Skip guest users: If your CSV includes guest user records that you don’t want to import as registered users, enable this option to exclude them from the import.
- Import in batches of: Set how many records should be imported per batch. This helps ensure smoother processing and reduces the risk of timeout issues.
Once configured, proceed to complete the import.
Before completing the process, you can choose to save your current settings for future use or proceed directly with the import.
- Click Save Template to store your import configuration for reuse.
- Click Import to start importing users based on the selected options.
Once the import finishes, a confirmation pop-up will appear. It will also display any failed records, allowing you to review and resolve them if needed.
That’s it! You’ve successfully imported users and customers into your site using the WebToffee Import Export WooCommerce users plugin.
Wrapping Up
This plugin makes it super easy to manage user data with CSV files, quick, simple, and reliable, all in just a few clicks. If you want even more flexibility, the premium version of Import Export WooCommerce Users offers advanced customization options, support for multiple file formats, automated scheduling, regular updates, and priority support from our expert team.
And there’s more! WebToffee also has powerful tools like the Order Import Export and Product Import Export plugins, which help you handle all your WooCommerce data more effectively.
We hope you found this guide helpful. If you have any questions or feedback, feel free to leave a comment below. Thanks for reading!


